For my birthday I received the Kona "Dark" Fat Quarter box, it was very exciting, and really until now I have hardly used it! Then I saw the
Crossroads quilts over at Red Pepper Quilts. They were so cool! Such a simple design! So many colors! I decided I could make one! I also think I can explain it! So everyone can make it!
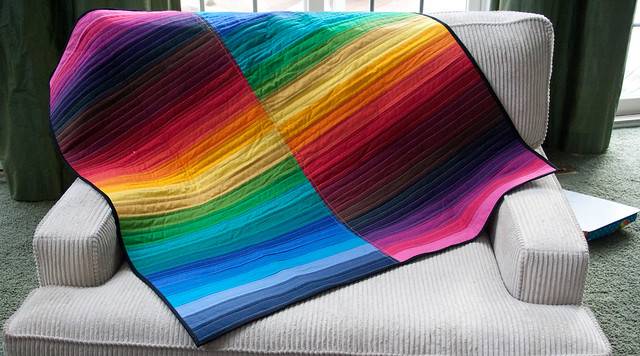
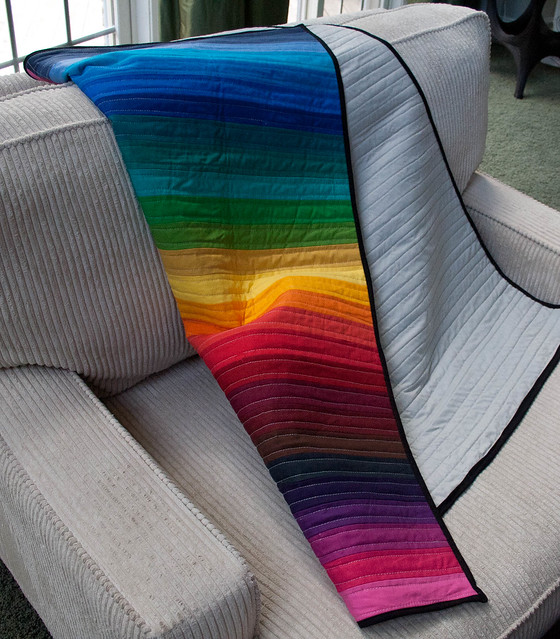
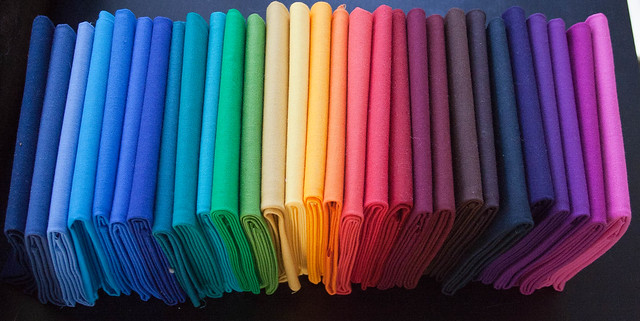
On New Years eve I picked out 28 colors. I wasn't looking for that many, I knew I wanted at least 24, and I settled on 28. (They are listed below). An even number will ensure that the middle color is different on either side, and odd will result in a solid strip across (if that's what you're looking for)
First cut two: 2"x 22" strips from each of the 28 fabrics, and line them up on your idea board.
Next iron them all with spray starch to help them stay straight.
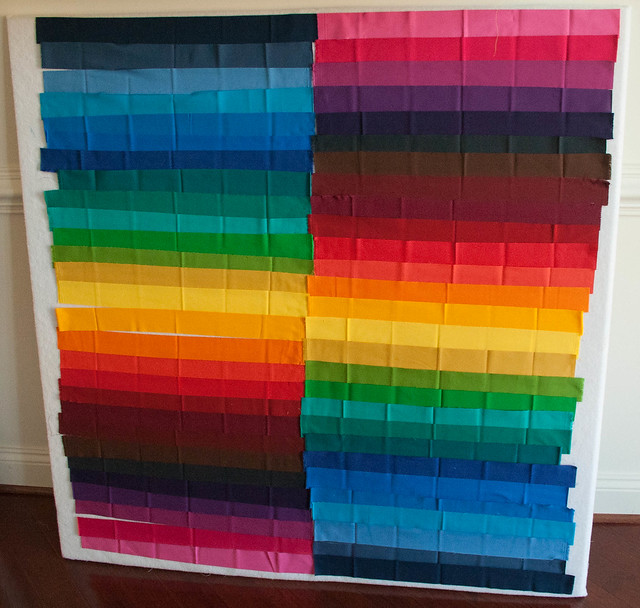 |
| From the top left: Navy, Windsor, Copen, Turquoise, Pacific, Surf, Deep
Blue, Teal Blue, Emerald, Jade Green, Clover, Grass Green, Curry,
Canary, Papaya, Orange, Coral, Red, Ruby Crimson, Brick, Chocolate,
Pepper, Purple, Hibiscus, Cerise, Pomegranate, Bright Pink |
Carefully sew them all together, and iron the seams open.
Repeat for the second side.
At this point I had alot of rough edges and selvedges that needed to be cut off, so I trimmed everything up. RPQ made her sides different widths for interest, you could make four chunks and alternate them... I like the idea of this being divided down the middle.
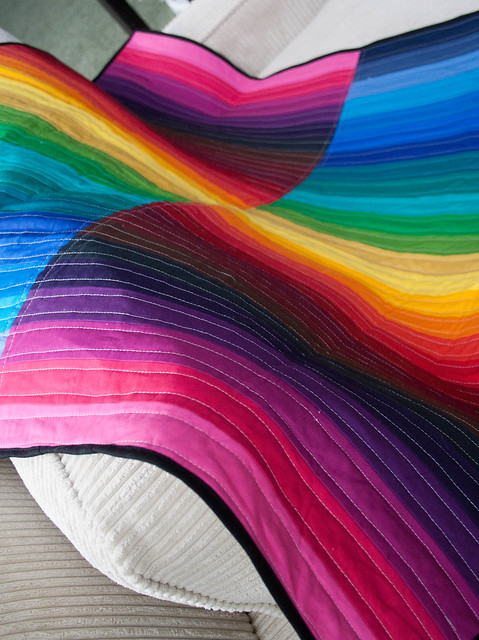
I then pinned all the matching seams together and sewed down the middle. I used a 3/8" seam allowance, not exactly sure why but it just seemed like a good idea. Pressed, and voila! Quilt top!
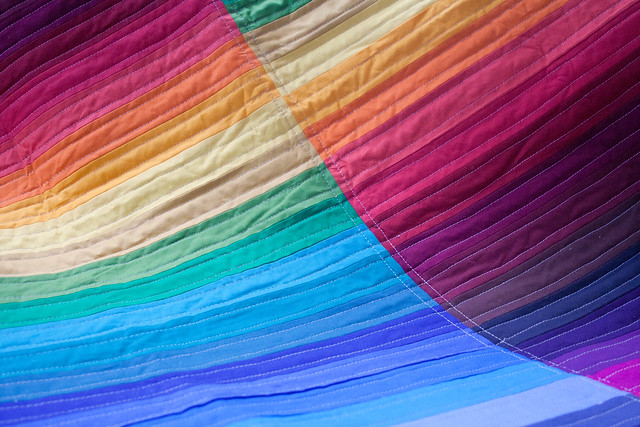
The quilting is 3/8" away from all the seams on either side, including the one down the middle. I debated making the grid like RPQ did, but I was running out of thread, and decided this was plenty of quilting. I used silvery thread that exactly matched the backing fabric (Kona Ash).
 |
| The finished size is about 40"x45" |
I think this looks fantastic, and considering I started at 10pm on New Year's eve and finished on 2 Jan, I couldn't be happier! The back is Kona Ash, and it's bound in Kona Black. I'm pretty sure there will be a baby Colorist quilt with these same colors arriving soon!
