It's been a wonderful year, I have had a blast sharing my projects! Here's a look back at some of the things I have accomplished!
I'll catch you guys next year :)
Saturday, December 31, 2011
Thursday, December 29, 2011
I Love Ikea Fabric
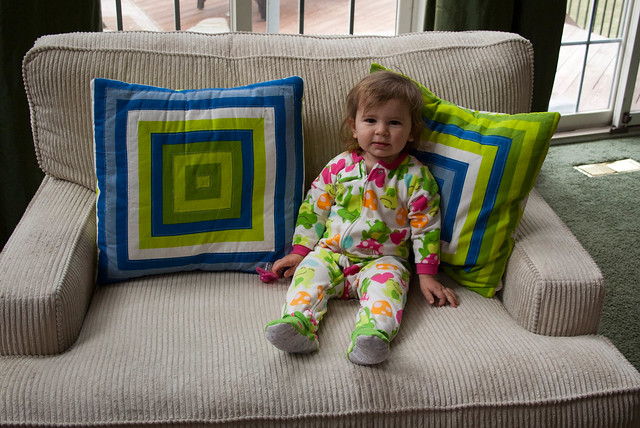
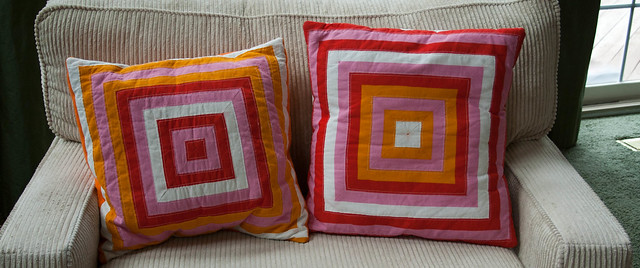
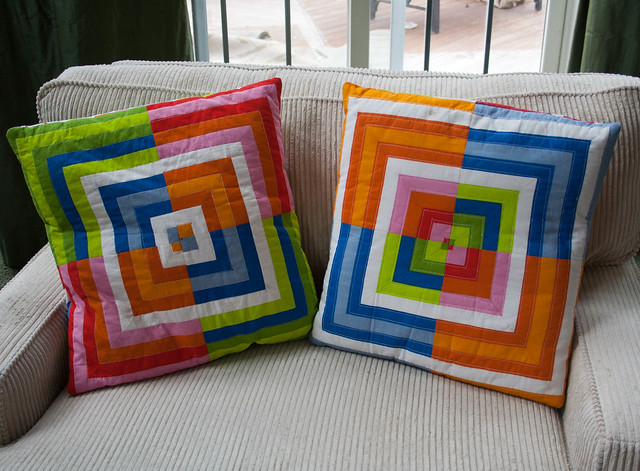
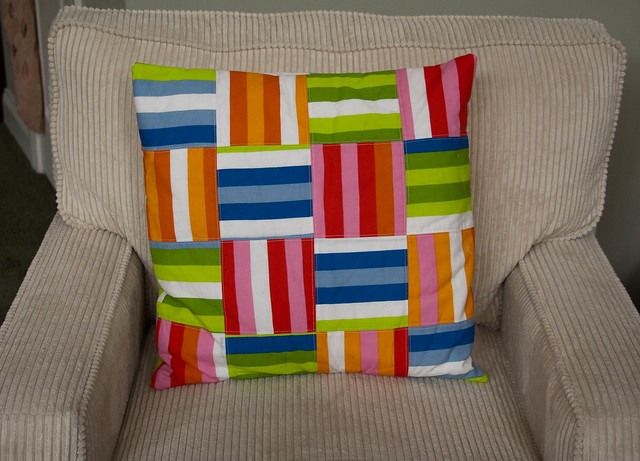
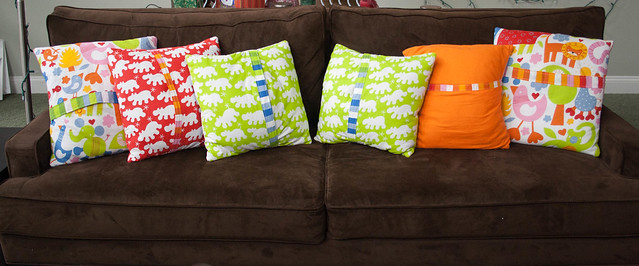
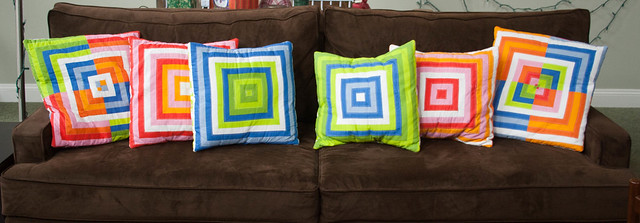
This past summer I picked up some bolts of fabric at Ikea, they are about 3 yards each and the fabric is 50" wide. They were $4, I should have picked up more! I got one stripe in both red/orange and one in blue/green. I have now made seven pillows! They are so bright and refreshing. There is even more fabric leftover!
Isabella is an excellent pillow model! |
Red/Orange Stripe - 18" pillows |
20" Pillows |
Basketweave pillow - 20" |
I went back to Ikea this fall looking for more fabric, I wanted to make some cute Amy Butler floor pillows, but it wasn't there! Boo! Hopefully it will come back. Frankly I'm debating putting some wide stripes on Spoonflower so I can make more things. :)
I quilted the tops of the pillows and put fusible interfacing in the back, it's just a flap that I embellished with a smidge of the stripe. The pillows are soft and feel very nice. It is just the 2 sets of stripes that I manipulated in as many was as possible!
The backing fabric is all from ikea (save the orange flannel) It's all adorable. |
And to plug my triangle calculator. I used it to make all but the basketweave.
This blog post is a bit late because the floor pillows are causing me some trouble, today I was able to sort them out and I hope to be finishing them in the next day or so. I tried something tricky... It will be OK, but it's taking forever.
Tuesday, December 27, 2011
The Colorist
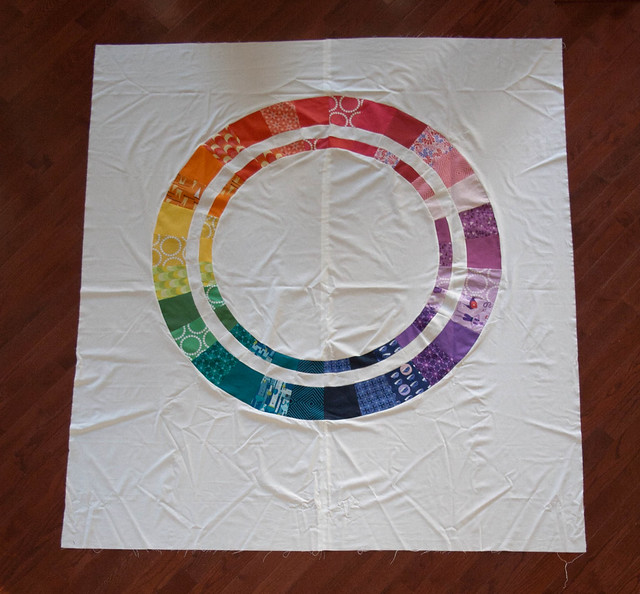
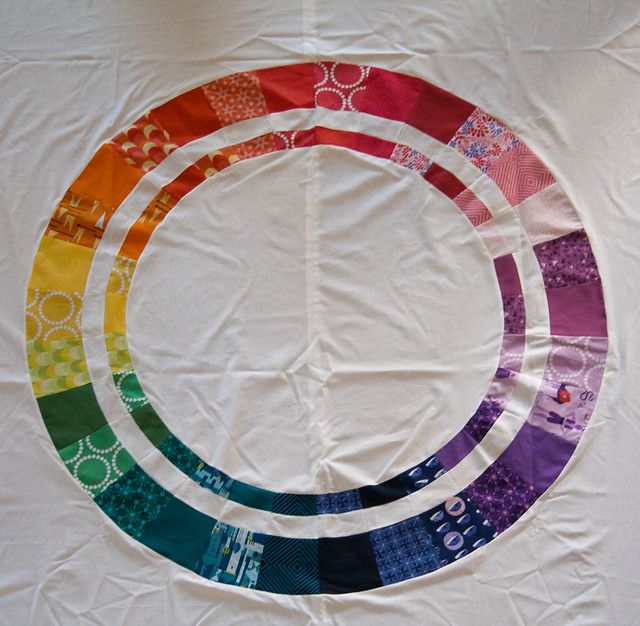
So I got this done in 2 naps and one evening. That is how I measure time. :) That is CRAZY fast!! My Parents are in town for the holidays and my Mom was able to help, which does speed things up significantly, but Wow, to have a completed beautiful top in 2 afternoons of work plus a little evening time is just madness!! It looks amazing and I learned some new skills on this.
1. Spray starch is the greatest thing ever - and now I know what my Grandma smelled like.
2. Lizzy House knows how to write a legible, outstanding pattern - at no point do you need to google "tips on completing the pattern" which is an essential step with EVERY SINGLE Amy Butler pattern. Love you Amy, but seriously.
3. Ripping fabric is how I'm cutting fabric from now on. One little snip, and *rrrriiip* and a perfect line, so satisfying
4. Curved seams are OK, just go slow and ease it through and it will be just fine
So I'm totally thrilled. I have some other things to work on while I wait for the backing fabric to arrive. I hope to ship this out to a quilter, I've never done that before but I love the concentric circles and I really cannot do that on my sewing machine.
Sunday, December 25, 2011
Merry Christmas and the Colorist
Merry Christmas!!
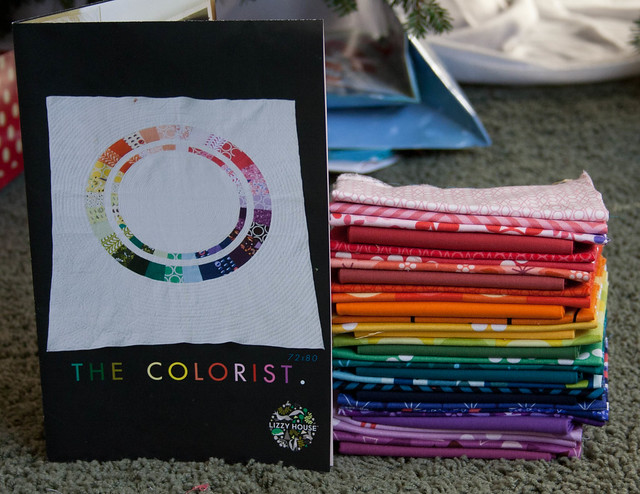
It was a happy one for me, under the tree I found this pattern! (Actually times 2 due to some communication issues between husband and mother) But it's totally great since I want to make the baby and the big quilt more than once (depending on how hard it is...)
Anyway, after the baby went to sleep my hubby and I quick went to work picking out 30 fabrics to make the rainbow. Here is the final selection!
Hubby wants me to make the baby one with only solids. I think since he got me the Kona dark box for my birthday he's eligible to make requests :)
I have so many projects in the making! I hope to share more soon.
Saturday, December 10, 2011
Saturday Projects
After making myself a snazzy iPad cover, I decided to make my Mom a new one. This one is fully washable! It has some cute Ikea striped fabric in it, and at her request is of course lined with fleece
It fits more loosely but still cleans the front of her iPad. I have found this is a great quick project to whip on on the same Saturday that we purchased a ENORMOUS Christmas tree that we now need to decorate. It's 12 feet and amazing!
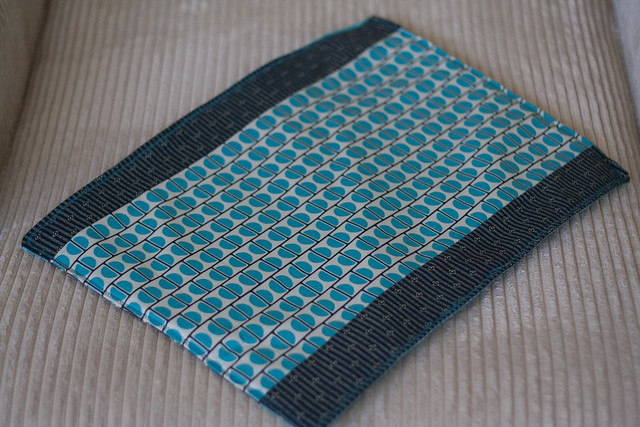
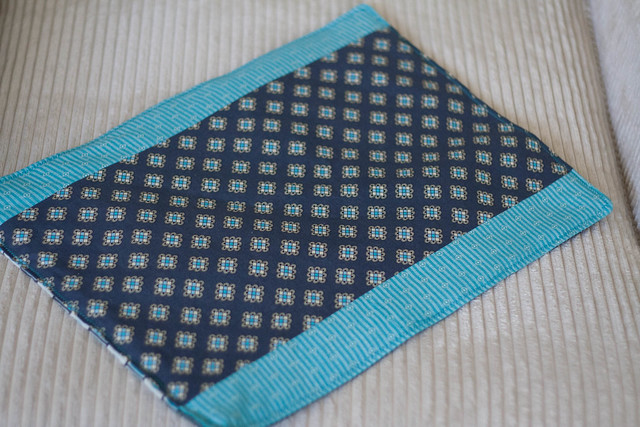
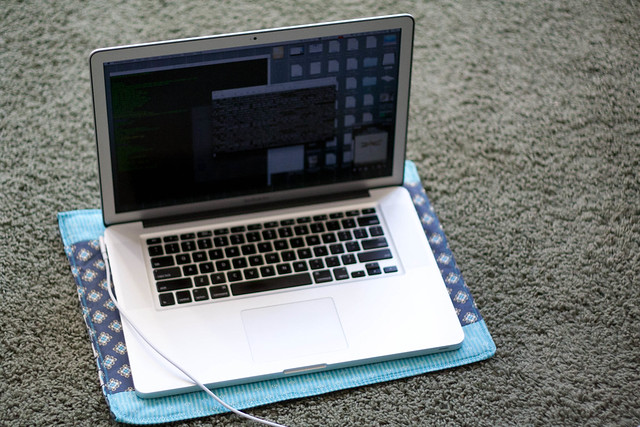
I also noticed that my husband's laptop was starting to take the finish off our kitchen table. Nothing serious yet, but I like that table and he likes to work there... SO I made him an extra large insulated place mat.
The fabric is Daisy Mae by DS for Joann, and I really thought that turquoise and navy print looked like a keyboard! It's moderately masculine and very soft.
I bought a quarter yard of the prints you see there and definitely have enough to make at least one more if not two. There is potholder material in the middle, and I just turned it right side out and zig-zagged the edges. It's not too fancy but it's getting the job done, and is machine washable.
A very productive Saturday!
I think I want to try and make a messenger bag. Isn't it just a larger iPad holder, with a strap? I think it's totally doable, so look for that soon!
Saturday, December 3, 2011
Sexy Hexy Christmas Quilt
Back in July (I think) I bought ALOT of Kate Spain's Flurry Fabrics. I have yard pieces, and half yard pieces, I'm pretty sure I have all of them. Additionally I got flannel that coordinated. I had no plan whatsoever but wanted to make a cute Christmas quilt for Isabella.
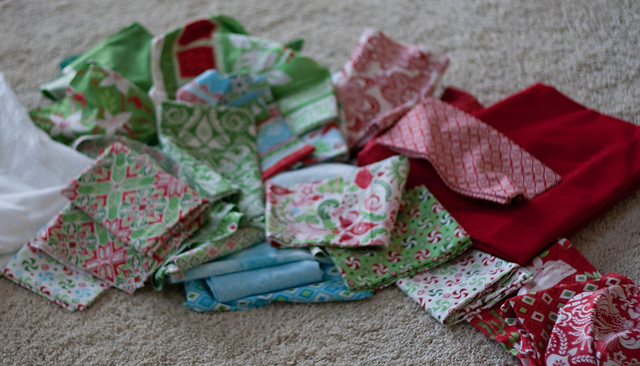
The stack of fabric is enormous, so I think I'm going to make at least 3 quilts and the first one is Sexy Hexy by Amy Butler.
It's a free downloadable pattern. Like all Amy Butler patterns I have (Weekender bag, Gum Drop pillow, and Honey Bun pouf) it is VERY VERY over-engineered. The directions for this quilt were no exception - 11 pages long. Let's be fair, the last 6 pages are pattern pieces but if you read down the supplies list there is so much stuff and then the directions are so involved by the time you actually get to sewing I'm pretty sure you don't care about the quilt anymore. After Googling "Sexy Hexy Love Quilt", and searching around on Flickr I realized that not many people have made this quilt, and I'm sure the 100% reason is the horrendous long-winded instructions that make this project seem much harder than it is. Luckily before I gave up and switched to something else I found this blog post, and suddenly the quilt was simple. Here are some good guidelines:
1. Follow the instructions to assemble the pattern page first, it's clever and works well.
2. Cut out the templates A, C and D these are used to make the full sized Hexagons
3. Do not add seam allowance to the A shape, it doesn't need it and looks weird.
-I put lightweight fusible interfacing on A - it get's appliqued and I think it looks/works better
4. Work one Hexagon at at time, cutting out one center, then six sides of template C then six of D,
-I used a pencil and traced the shapes on the fabric then cut out with scissors
**note template D takes 1/4 yd of fabric for one hexagon, template C takes more than 1/8 but less than 1/4
5. Sew C to D six times as shown in a picture on the instructions, press, then sew them together to form the outside of the hexagon, press.
6. Applique A to the center, I used 2 pins per side (I NEVER use pins for anything so this is a big deal for me)
7. Repeat until you have seven hexagons, it's six surrounding one in the center - for planning purposes.
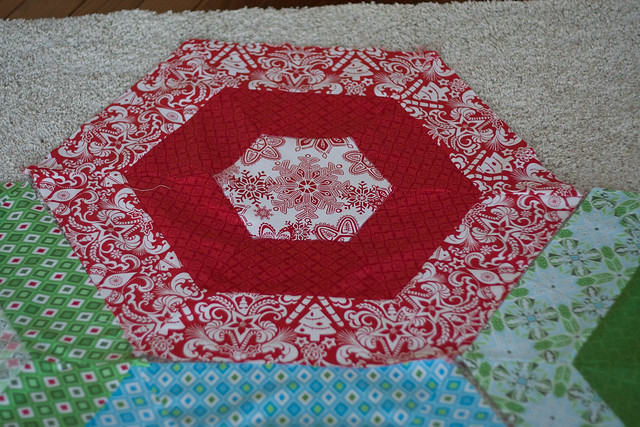
I like this method because you can build each hexagon as you go based on what you want the final quilt to look like. I have only made a few, but they are pretty easy and I think look pretty awesome.
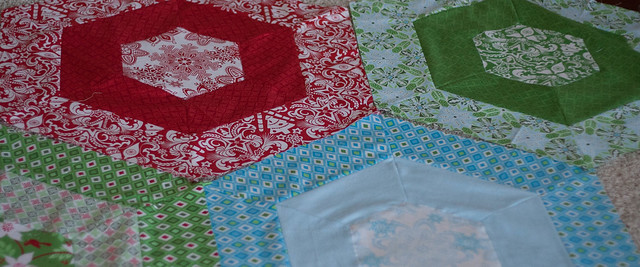
Another cool idea would be to make "string blocks" cut out the side templates out of wonky cut - sewn together strips.
The rest of the quilt is 1/2 hexagons which seem to be pretty straight forward and then these little side pieces which also don't seem hard. I am apprehensive about Y seams, but I'm going to skip the directions and look on you tube. I'll be happy to post links and tips then.
Happy Christmas Hexing!
Thursday, December 1, 2011
iPad2!!
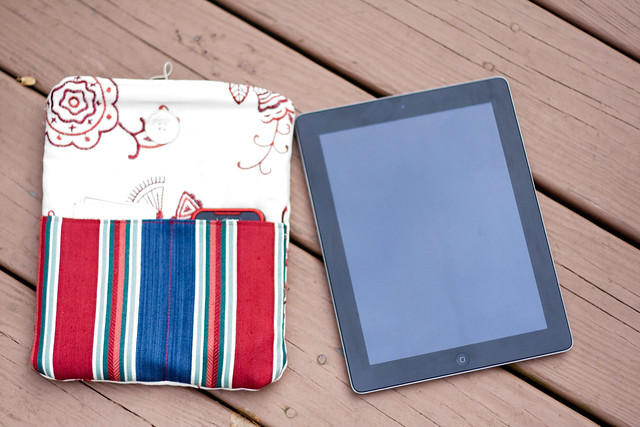
Recently my honey got me an iPad2, now it's supposed to be "ours" but he's not with it all day... Anyway I found the covers at the Apple Store to be a bit, overpriced and boring. I was positive I could not make a good cover for it, and then I was looking on Etsy and realized, yes, yes I could. So when my parents got an ipad2 on Black Friday I quickly whipped up this cover:
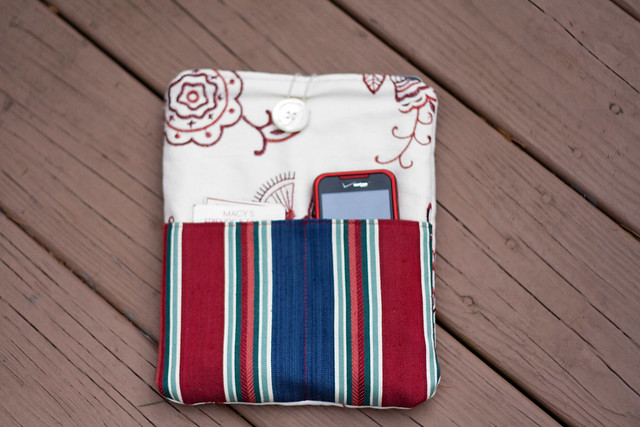
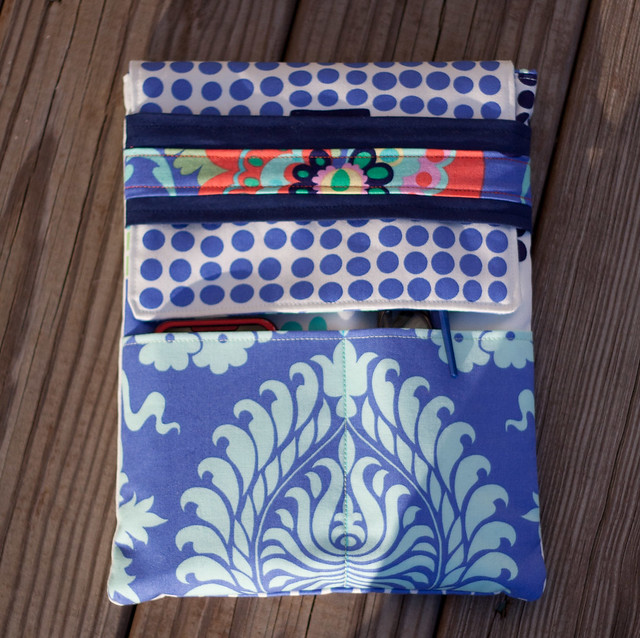
It has an open top, with an elastic-button closure. The outside is all leftover decorator weight fabric and the inside is lined in fleece. My measurements were a bit snug with all the bulk of the batting and heavier fabric not to mention the interior fleece, but the snug fit created a fantastic side effect... IT CLEANS THE FINGERPRINTS! That's right people, it cleans it all off. So I highly recommend the fleece lining. I was very happy with this, but personally feel the elastic is flimsy, and an easy point of failure that would be hard to repair. I like a flap. So I looked at this cute embroidery case I bought and modeled it much bigger. I used some of my Amy Butler Fabrics and voila!
Notice it opens revealing 2 pockets on the front, that's my smart phone on the left and my glasses and a pen
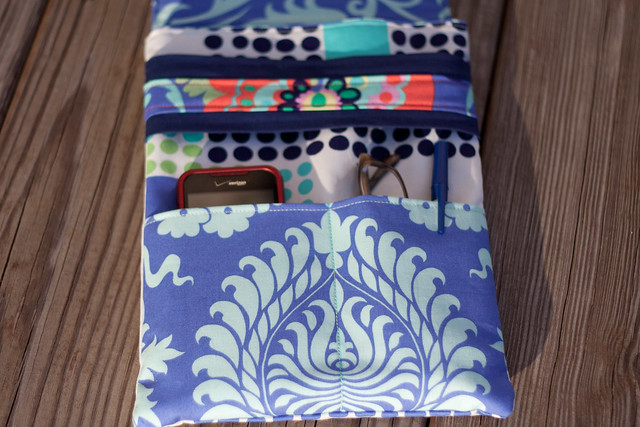
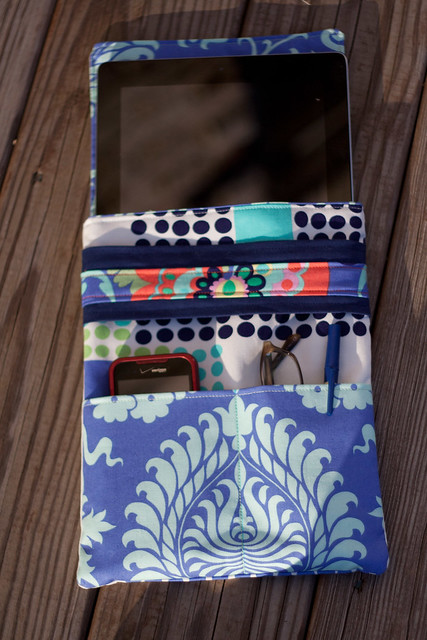
I LOVE this, this is easily the best thing I have ever dreamed up and executed. Usually stuff I make w/o a pattern looks, well exactly like that. This actually looks like something you would buy.
The fit isn't quite as tight as the first case I made for my parents, and since it's lined with quilting fabric, not fleece there is very little cleaning action, but I'm less concerned about that and MUCH happier about how it fits and what it looks like. I would like to get a tutorial up since this takes about an hour to sew, but it's Christmas time and I'm super busy, but perhaps if enough of you comment... I might find the time :)
It has an open top, with an elastic-button closure. The outside is all leftover decorator weight fabric and the inside is lined in fleece. My measurements were a bit snug with all the bulk of the batting and heavier fabric not to mention the interior fleece, but the snug fit created a fantastic side effect... IT CLEANS THE FINGERPRINTS! That's right people, it cleans it all off. So I highly recommend the fleece lining. I was very happy with this, but personally feel the elastic is flimsy, and an easy point of failure that would be hard to repair. I like a flap. So I looked at this cute embroidery case I bought and modeled it much bigger. I used some of my Amy Butler Fabrics and voila!
Notice it opens revealing 2 pockets on the front, that's my smart phone on the left and my glasses and a pen
I LOVE this, this is easily the best thing I have ever dreamed up and executed. Usually stuff I make w/o a pattern looks, well exactly like that. This actually looks like something you would buy.
The fit isn't quite as tight as the first case I made for my parents, and since it's lined with quilting fabric, not fleece there is very little cleaning action, but I'm less concerned about that and MUCH happier about how it fits and what it looks like. I would like to get a tutorial up since this takes about an hour to sew, but it's Christmas time and I'm super busy, but perhaps if enough of you comment... I might find the time :)
Thursday, October 6, 2011
Ju-Ju-Be
Eh? What is that? WELL for those of you not in the know, Ju-Ju-Be is a brand of handbags, backpacks etc, they are specially designed with Mom's in mind and make absolutely fantastic baby bags. They use space in an efficient and practical manner that just makes a busy Mom happy, you don't have to think about fitting all the nonsense in your bag or finding it later, it's easy and intuitive.
ANYWAY as I am not a paid spokesperson for them i'll leave it at that and continue onto why we all should care :) These bags have a cult following, people LOVE them, the prints and styles are only around for a short period of time. There are people that can customize your bag, and the change pads are cannibalized for parts!
That's where we start today. My Sister-in-Law is... enthusiastic... about these bags, she has a few of them and loves them to death. I personally have two, a BFF in Cobalt Blossoms and a beQuick in Champagne Bubbles (gift from SiL).
She purchased a pile of scraps, by scraps I mean tiny pieces of the fabric the bag/change pads are made of. In a variety of colors that were in no relation to each other. (I really wish I had a "before" photo...) I had on hand flannel to line the bags; I love a soft flannel lining it's extremely versatile. After making regular style pouches, I tried sewing/clipping off the corners to make more of a "boxy" look. This is still in development, but I'm very happy with the results.
All in all I made six bags, and I have some fabric left over for one possibly two more. The scraps are small and since the fabric is so stiff it can't be patched together as neatly as quilting cotton.
With the exception of the tiny Blue Bouquet that SiL kept for herself :) The remaining bags are FOR SALE!! Hooray!
Go get em in my Etsy shop!
ANYWAY as I am not a paid spokesperson for them i'll leave it at that and continue onto why we all should care :) These bags have a cult following, people LOVE them, the prints and styles are only around for a short period of time. There are people that can customize your bag, and the change pads are cannibalized for parts!
That's where we start today. My Sister-in-Law is... enthusiastic... about these bags, she has a few of them and loves them to death. I personally have two, a BFF in Cobalt Blossoms and a beQuick in Champagne Bubbles (gift from SiL).
Tiny small Ju-Ju-Be pouches |
With the exception of the tiny Blue Bouquet that SiL kept for herself :) The remaining bags are FOR SALE!! Hooray!
Go get em in my Etsy shop!
Wednesday, October 5, 2011
Sugar Creek and the HST
I'm pretty obsessed with the DS fabrics you can purchase at Joann's Fabrics. They are nice quality, you can use coupons, and they are something that requires collecting. I have recently obtained 17 of the 18 prints in her new line, Sugar Creek. (The 18th is in the mail from Etsy!)
I am a new user of Pinterest, it's super fun, and I ran into some beautiful HST quilts, and then found this tutorial. I THEN saw this quilt on Fresh Lemons. Between the two I was decided that my stack of Sugar Creek (with some Picnic's and Fairgrounds that I had leftover from Swoon) would shine beautifully in a pattern like this.
So I cut out a bunch of 9" triangles (I cut out a 9" square, and then cut it in half), I then got my hands on some Kona Snow which looks nice with this. At that point I was feeling a little stuck, and I remembered that black and white photographs of fabric help with sorting values. So I took some pictures and did some sorting. Ultimately coming up with this arrangement,
You'll notice in the B&W photo it's easy to see which fabrics blend together and which ones will contrast against each other. Since I'm pretty sure i'm going to put the white in, ala Fresh Lemon's Parisville, I will now select triangles from 2 different piles to put my blocks together. This makes my 120 triangles WAY more manageable and much easier to pair up.
Let's get sewing!
I am a new user of Pinterest, it's super fun, and I ran into some beautiful HST quilts, and then found this tutorial. I THEN saw this quilt on Fresh Lemons. Between the two I was decided that my stack of Sugar Creek (with some Picnic's and Fairgrounds that I had leftover from Swoon) would shine beautifully in a pattern like this.
So I cut out a bunch of 9" triangles (I cut out a 9" square, and then cut it in half), I then got my hands on some Kona Snow which looks nice with this. At that point I was feeling a little stuck, and I remembered that black and white photographs of fabric help with sorting values. So I took some pictures and did some sorting. Ultimately coming up with this arrangement,
Clockwise from top left: High Contrast, medium contrast, light, medium, dark |
In case you're wondering the 18th fabric will be in the dark pile in the lower left corner. |
Let's get sewing!
Tuesday, September 20, 2011
Farmer's Wife Week 16 and 17
Well here we are again, another week and another pair of blocks. I really enjoy making them. My goals now are to make pairs of blocks that somewhat coordinate, but from week to week they really can have nothing to do with each other.
I have seen some sets of blocks where people are using a very finite set of fabric and their blocks all coordinate and look fantastic, these aren't those types of blocks :)
This is my favorite block so far! what's funny is, I try and use a rotary cutter to cut out the small squares, it's fast and they are more accurate than the templates, EXCEPT when I cut them all out the wrong size. Which I did with this block, and see that pretty darker purple color, well I didn't have enough fabric to make 8 more squares, so I had to make some changes, but it looks great and I'm so proud.
I'll post a big group shot next week.
Sunday, September 18, 2011
Sugar...
is my enemy. It is. While I was pregnant, and then when I was making milk I was reasonable with sugar, but in no way went "crazy". Well. maybe when I first got home from the hospital with my baby I was definitely eating a jumbo pack of oreos every few days. So my milk production is finished now, and i'm realizing that amazing metabolism that I enjoyed for a year is gone. *sniff*. I'm not looking for sympathy, more like accountability. Also some understanding if this blog gets a *tiny* bit cranky over the next week :)
Lizzy House is doing a juice cleanse. That is seriously hardcore. I'm just cutting processed foods, sugar and white flour. I am also going to do Pilates again, OH and try and take a walk, with the baby in a stroller (when she walks with me we don't go very far very fast and we need to stop alot and look at bits on the ground).
So we're back from OBX, which was teriffic and I hope we can get back there next year. It's time for me to start quilting again! This week I have some farmer's wife to catch up on, some 100 quilts for kids tops to make and a NEW project to start! YEP it was designed while relaxing on the beach, I actually designed a bunch of quilts (while eating oreos...) I realized that designing w/o looking at fabric or any constraints at all is incredibly liberating. I am really excited about my next batch of original quilts.
I will leave you with yet another cute beach shot, I love my little honey :)
Shoot! That's my water in the sand! |
Friday, September 16, 2011
OBX
This week my family went to the Outer Banks, NC. This was our first OBX experience, and Isabella's first beach visit! It is beautiful here. Absolutely gorgeous.
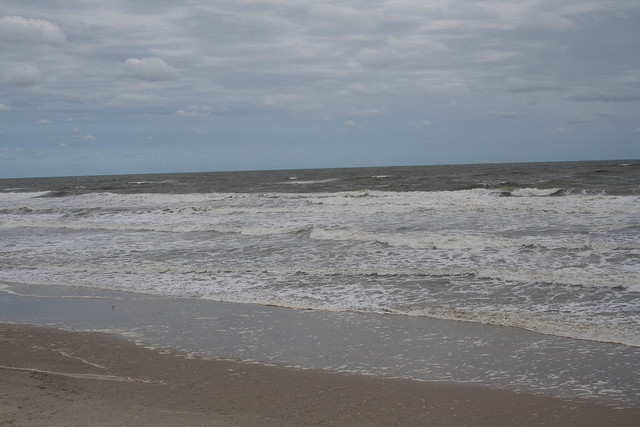
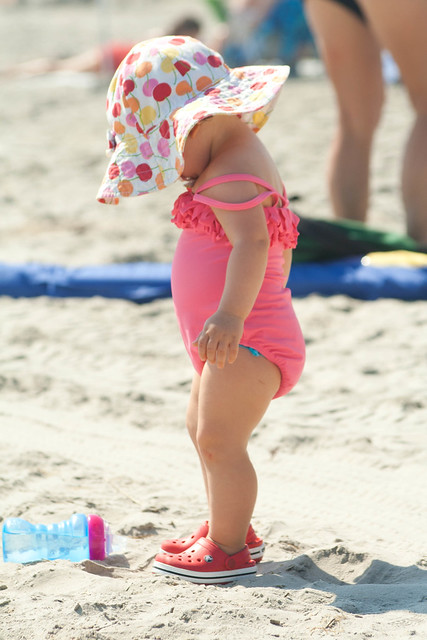
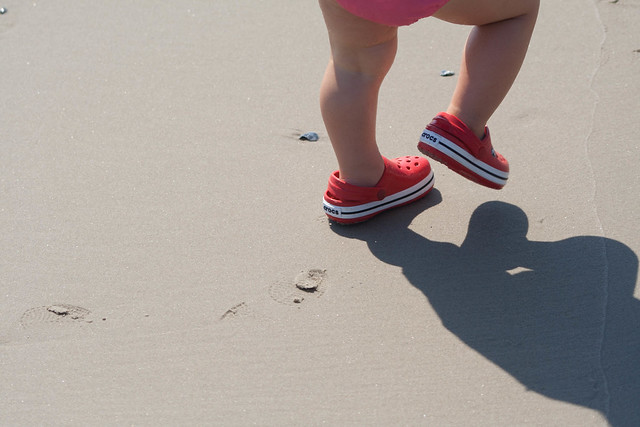
My baby girl is fearless. She really is. I was expecting her to run into the water, dive in and start body surfing the first min of the first day. (Yes, she is 1 and yes that might be unreasonable). As it turns out she HATES sand. HATES HATES HATES. She would cry and scream and pout and pull up her little legs and refuse to walk. She wouldn't go in the ocean or play in the waves because of the sand. This made me sad, since I love the beach and the ocean and she is an active baby and needs to run around and even though I brought 2 large blankets, this sand issue needed to be resolved. Our 2nd night we wandered into a souvenir shop and purchased her a itty bitty pair of red Crocs. WELL these were magic shoes! Suddenly she was running towards the waves! Playing with them and having the time of her life. She would run and play and pick up shells and sticks until she begged to be picked up and then would promptly fall asleep in your arms. It was so cute and wonderful. Amazingly enough by day 5 she was testing the sand with her bare feet. As long as she could hold one of her bright red shoes she was OK, by the end of day 5, our last beach day she was digging in the sand, making large piles and running away from us into the waves chest deep.
I haven't done any real projects, it's vacation! I have been sketching up a storm and hopefully will have some cool new things to show you. This trip has really re-charged my creative batteries.
As pretty as the sunny days are I like cold blustery days at the ocean almost as much. The colors are beautiful, she sea is really rough there is something so relaxing about it. |
With her shoe in hand, she considers stepping into the soft sand. |
Saturday, September 10, 2011
Farmer's Wife week 15
These blocks were a BLAST to make. Such a nice break from the super difficult blocks from the past.
I love that I get to use the fabrics from my Summer Sampler, now that it's complete, they are fair game!
My goal for the Farmer's Wife Sampler is to use lots of scraps from other quilts, and only a few fabrics purchased expressly for it. My reasoning is that since this quilt will be taking a year, I want it have bits and pieces from everything I worked on. It's going to be a big jumble of colors when I'm done and I have no idea about assembly yet but I'm sure it will all pull together in the end. So far I'm thinking that a traditional layout will not work, and to try something different.
I am very excited to say I'm going on vacation tomorrow! Next posts should be from the Outer Banks, NC. From the beach! Hooray! No quilting, but I have some other crafty things in mind...
Have a great weekend everyone.
Wednesday, September 7, 2011
WIP Wednesday!
I did alright this week. It wasn't as much as I was hoping to get done, but we had a fantastic holiday weekend. Sometimes you need to just chill out with the family, and actually let the iron cool down. :)
No pics... sorry :)
Finished:
Hibernating
I did alright this week. It wasn't as much as I was hoping to get done, but we had a fantastic holiday weekend. Sometimes you need to just chill out with the family, and actually let the iron cool down. :)
No pics... sorry :)
Finished:
- My triangle calculator. Go check it out. Make templates for all your triangle needs using items around the home :)
- One "100 quilts for kids" quilt top
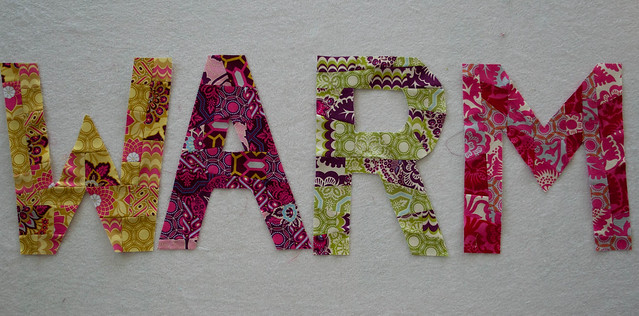
- Billboard quilt along - W-A-R-M finished
- Graph paper sketches of a new quilt!
- Farmer's Wife quilt a-long 30 blocks completed! (look for post tomorrow)
- Billboard quilt along, "&" on freezer paper waiting to be assembled.
- "100 Quilts for Kids" 3 more quilt tops - I had really hoped to get these done by Friday so i could mail them to Kate in hopes that they could be quilted next weekend but... I really don't think that's going to happen.
Hibernating
- Subway quilt
Tuesday, September 6, 2011
Triangle template calculator
I love this style of block:
It looks amazing, and seems so simple to just cut striped fabric in a way that makes that neat square thing happen.
It also works for hourglass blocks, where the stripes are strips of fabric sewn together. The "In a Spin" quilt from Red Pepper Quilts also uses this block assembly technique.
Because the math to make these blocks can be somewhat of a pain, especially if you're trying to use up scraps---and don't forget about the seam allowance---I wanted to make an easy to use calculator to determine the correct dimensions for any size block. Not to mention that I think it's ridiculous to have to buy a plastic template, especially if you want a special size. Everyone has cardboard lying around! I have made this handy calculator, to make your own template at home!
PS. if you're a math geek (or even if you're not) and are curious on how this formula was derived, post a comment! I'd be happy to do a follow up post with the details.
Alright, so... the block is created by making a regular square and then dividing it into four triangles like this:
Here is the Fiber Fix super-easy solution to creating these blocks:
Finished length: inches with seam allowance
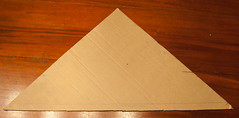
The number provided is the distance you need to measure down two sides of a piece of cardboard (cardstock, plastic.. whatever you have around). Make sure you have a proper right angle, and measure like so.
Cut along the dotted line and you have your triangle template!
If you are interested in the strips all matching up to make cool concentric squares then mark on the sides of your triangle where the various stripes are.
Here is an example of a template I made a while back for my Ikea quilts. I wanted the sides to be 27" so that 2 squares next to each other would be the width of the fabric.
The fabric I started with:
Here's another square I made with the rest of the fabric:
And the finished twin IKEA quilts:
It looks amazing, and seems so simple to just cut striped fabric in a way that makes that neat square thing happen.
It also works for hourglass blocks, where the stripes are strips of fabric sewn together. The "In a Spin" quilt from Red Pepper Quilts also uses this block assembly technique.
Because the math to make these blocks can be somewhat of a pain, especially if you're trying to use up scraps---and don't forget about the seam allowance---I wanted to make an easy to use calculator to determine the correct dimensions for any size block. Not to mention that I think it's ridiculous to have to buy a plastic template, especially if you want a special size. Everyone has cardboard lying around! I have made this handy calculator, to make your own template at home!
PS. if you're a math geek (or even if you're not) and are curious on how this formula was derived, post a comment! I'd be happy to do a follow up post with the details.
Alright, so... the block is created by making a regular square and then dividing it into four triangles like this:
Here is the Fiber Fix super-easy solution to creating these blocks:
- Decide how big you want your finished block to be. The length of one of the sides of the square is the "finished length". For example, if you want your finished block to be 8 inches square and your seam allowance is a quarter inch, this will give you a ready-to-sew block of 8.5 inches.
- Select seam allowance (one quarter or one half inch).
- Click "calculate"
Finished length: inches with seam allowance
The number provided is the distance you need to measure down two sides of a piece of cardboard (cardstock, plastic.. whatever you have around). Make sure you have a proper right angle, and measure like so.
Cut along the dotted line and you have your triangle template!
Notice lots of pencil marks to line stripes up |
And the finished twin IKEA quilts:
Sunday, September 4, 2011
Billboard Quilt W-A-R-M
Remember this quilt along?
Yep I'm still working it! Just wanted to have some actual progress before i started throwing pics up :) I hope to have all the letters done this week.
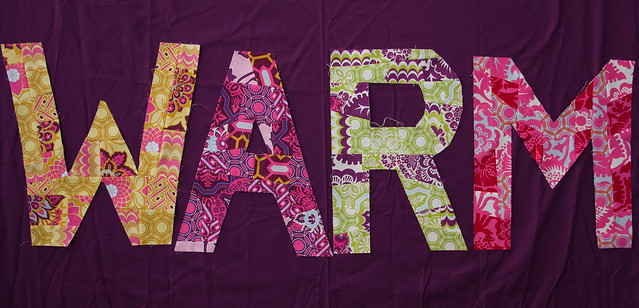
I'm about halfway done with the letters for this quilt. I'm VERY glad I chose something simple to write. To be honest, each letter is going faster and faster, but the part in the process where i have to cut out 40 tiny shapes that are weird sizes is SO TEDIOUS. It's the worst, it makes me angry it's so boring. That's why I only do one letter a day :) It's totally weird, because the farmer's wife blocks are MUCH smaller and normally have way more pieces and I enjoy cutting them out. So it makes no sense, but one letter a day seems to be my pace.
What's funny is the "M" I picked the colors as i was cutting it out instead of picking them upfront, and I was totally positive this would be not a strong letter. NOPE! It's my favorite!
So here we are on Kona Eggplant. The final backdrop! I haven't appliqued yet. Just makin' letters.
Don't forget the back is already in progress. This pretty quilt should be coming together very soon. I'm still at a complete loss at the quilting, but I find that after the quilt sandwich has been made something always comes to me.
Subscribe to:
Posts (Atom)