I was a diehard fleece lover. It's so squishy and soft and awesome. It doesn't need to be hemmed, it doesn't unravel, it's really a petroleum based miracle fabric. Then I made the following quilt for some friends about to bring home their newly adopted son. It is a very happy ending and I wanted to make a special project for them.
It is the softest snuggliest thing I have ever made. It is primarily flannel with some quilting cotton all mixed in. I was smart and pre-washed everything so that it all shrank and bled and did all the nasty things it was going to do, and it's ridiculously soft and delicious. I am planning to make Isabella a blanket/bedcovering of sorts and I think flannel might be our ticket!
So now I get the deal with flannel, and realize why there is so much of this stuff at Joann's. I will still be using fleece because it provides a very different texture that flannel doesn't, but wow. I love flannel.
This quilt was my first "log cabin" style blanket. I tried to keep it modern by using some solids and some modern prints. It was so fun to make a complete breeze. I got the pattern from Modern Log Cabin Quilting. Which has about eight more patterns I intend on making. Usually I shy away from patterns, I like to do things myself and hate authority so much that the idea of following a pattern is too restrictive. BUT it is easier, and saves tons of time, and with this one I quilted it my own way so my stamp is on it.
Sunday, April 10, 2011
Friday, April 1, 2011
The Big Reveal and an 8 month old baby
Isabella turned eight months old this week. It is hard to believe that she hasn't been in our family forever; and that she will get bigger and grow up. We have cats, they start small and stay small and are always our little babies. Somehow I just can't believe that our tiny little small (who isn't that tiny anymore) is going to become a large person. This last month she has begun to crawl, and pull herself up on EVERYTHING. If it's on a low table, it is now within her reach. Needless to say there is a lot less clutter lying around.
All that aside. I finished my bed makover! I think it looks really nice. I clearly have much to learn about quilting, becuase there are lots and lots of mistakes, but this was relatively inexpensive, and took two weeks to complete. That kind of instant gratification makes me very happy.
The pattern for the quilt can be found here. The euro-pillow covers and the small pillow were out of my head, and there is no pattern, but they were relatively simple and I did all straight line quilting because it looks fresh and modern. (The euro pillows are my favorite part)
All told I used 7 fabrics, 3/4 of a yard each, 2/3 of a yard of lavender fleece and 5.5 yards of powder blue fleece, and one ikea king sized contour bed sheet. I used every usable piece of that bed sheet. I have nothing usable left. I can't tell it's a sheet, it looks exactly like quilting cotton to me, but heck, what do I know?
Thursday, March 24, 2011
Spinach Green vs. Powder Blue
After completing the front, and talking to my husband about the back (read: I am discussing the back and he is working on the computer, periodically saying "baby this is your project, I'm sure it will look beautiful") I decided that fleece would make a fantastic back! Remember we have already deviated from traditional quilting to a "bed covering" so I can do whatever I want. I was thinking about the quilt I made for Isabella, and it has a fleece back and is just so nice. There are also cost advantages, fleece is 60" wide so I only need 5.5 yards and it's super cheap and on sale since it's March and it's warm where I live.
So that left one question, color... Fleece is somewhat limited, and at the end of the season it's even more limited, so I was ready to do whatever, I ended up picking spinach green fleece. Has anyone other than me noticed that the lighting in Joann fabrics is totally odd. It's this weird fluorescent light that makes colors look totally different than they might actually be, specifically it makes them look more mellow than they really are.
So what I thought was a pretty spring green was really SUPER BRIGHT GREEN!!!!! not cute, not pretty, not good. So instead of making 10 kermit the frog costumes I returned it! Yes Joann actually returns cut fabric, who knew. I settled on Powder Blue, which is so much softer and prettier. It looks great in the room and was a very nice squishy fleece.
I don't like seams on the back so I put this little bit of trim that breaks up the seams and is a nod to the front. I'm still using my original pile of fabric which makes me proud. I think I can get one small quilted pillow of of the last bits of the remnants.
I will now sandwich these two ENORMOUS pieces of fabric and attempt to quilt them using my normal little sewing machine. I have read some techniques involving rolling and unrolling fabric making it easier to manage, but I have NEVER done this before. Luckily this is meant to be quick and inexpensive and however it comes out I'm sure I can style the bed so it looks great :)
So that left one question, color... Fleece is somewhat limited, and at the end of the season it's even more limited, so I was ready to do whatever, I ended up picking spinach green fleece. Has anyone other than me noticed that the lighting in Joann fabrics is totally odd. It's this weird fluorescent light that makes colors look totally different than they might actually be, specifically it makes them look more mellow than they really are.
So what I thought was a pretty spring green was really SUPER BRIGHT GREEN!!!!! not cute, not pretty, not good. So instead of making 10 kermit the frog costumes I returned it! Yes Joann actually returns cut fabric, who knew. I settled on Powder Blue, which is so much softer and prettier. It looks great in the room and was a very nice squishy fleece.
![]() |
| Kitties like to test out the blanket, make sure it's good for naps. |
I don't like seams on the back so I put this little bit of trim that breaks up the seams and is a nod to the front. I'm still using my original pile of fabric which makes me proud. I think I can get one small quilted pillow of of the last bits of the remnants.
I will now sandwich these two ENORMOUS pieces of fabric and attempt to quilt them using my normal little sewing machine. I have read some techniques involving rolling and unrolling fabric making it easier to manage, but I have NEVER done this before. Luckily this is meant to be quick and inexpensive and however it comes out I'm sure I can style the bed so it looks great :)
Tuesday, March 22, 2011
King-Sized Fun
While in the fabric store, I casually mentioned that I was going to use some sheets from Ikea. WELL this is apparently the worst thing I could ever do. Quilting purists feel that sheets are just not appropriate, and why would you put all that work into something that was made of sub-standard materials, specifically cheap sheets.
Hmmph. I want this to be inexpensive and quick, I am not creating an heirloom but a trendy bed covering that at some point will turn into a blanket we use at the beach. Sheets are huge and I already own them, so therefore have renamed this project from "quilt" to "bed covering". Now all the quilting purists can relax.
The top is finished, and looks great, sheets and all. In reality it's just the contour sheet that I cut up, the flat sheet is still in tact, and will not be used for the back as originally planned. I have some other ideas.
It took longer than I anticipated to get the composition of the stripes looking good, not repeating vertically or horizontally in an annoying way. I'm very happy with how it turned out. It is SO much easier to cut things out of pretty half yard chunks than random scraps. Stack. Cut. Done.
This picture was taken not for the blog (but it is handy...) but due to a small mobile baby and 2 kitties my fabric squares would not have stayed like this for very long at all! As it turns out I made the spaces in between the strips much wider than the original pattern called for, I went to 7" instead of 5. I thought it looked better on the larger quilt.
I have a great idea for the back, should be done in a few days. I am both excited and apprehensive about the actual quilting portion of this project. This is a huge blanket, and I want it to turn out nice.
Hmmph. I want this to be inexpensive and quick, I am not creating an heirloom but a trendy bed covering that at some point will turn into a blanket we use at the beach. Sheets are huge and I already own them, so therefore have renamed this project from "quilt" to "bed covering". Now all the quilting purists can relax.
The top is finished, and looks great, sheets and all. In reality it's just the contour sheet that I cut up, the flat sheet is still in tact, and will not be used for the back as originally planned. I have some other ideas.
It took longer than I anticipated to get the composition of the stripes looking good, not repeating vertically or horizontally in an annoying way. I'm very happy with how it turned out. It is SO much easier to cut things out of pretty half yard chunks than random scraps. Stack. Cut. Done.
This picture was taken not for the blog (but it is handy...) but due to a small mobile baby and 2 kitties my fabric squares would not have stayed like this for very long at all! As it turns out I made the spaces in between the strips much wider than the original pattern called for, I went to 7" instead of 5. I thought it looked better on the larger quilt.
I have a great idea for the back, should be done in a few days. I am both excited and apprehensive about the actual quilting portion of this project. This is a huge blanket, and I want it to turn out nice.
Saturday, March 19, 2011
Bed Makeover
While at the fabric store procuring a back for my Hawaii quilt, I bought supplies for my next project.
The first room of the house we decorated was the master bedroom. I thought it was a good idea to wake up in a decorated space. It would be soothing and then after everyone is awake and has their wits about them the rest of the undecorated/unfurnished house would await. But that room would be a nice little oasis from it all. Our first winter we were still on propane, which among other things is expensive, so since we were working most of the time, we treated our bedroom like a studio apartment, thereby saving ourselves some heating costs.
I didn't have any trouble with paint color and the furniture is really nice, and I like the room, but bedding... I've always had trouble, Currently my bed looks like this:
That is a on-sale duvet of micro-suede, those are some tone on tone euro-shams and boring sheets. Beige and white... I know it's hard to believe the person who picked out that red fabric could have such a large swath of beige in her house... but it's true! The duvet is snuggly, warm and child/pet friendly, just not very exciting. So for my next project I am going to give my bed a makeover! I want it to be relatively easy to complete, be appropriate for the warm weather which is already upon us, and freshen up the room. So from my favorite quilting blog I found this pattern. It looks easy and modern.
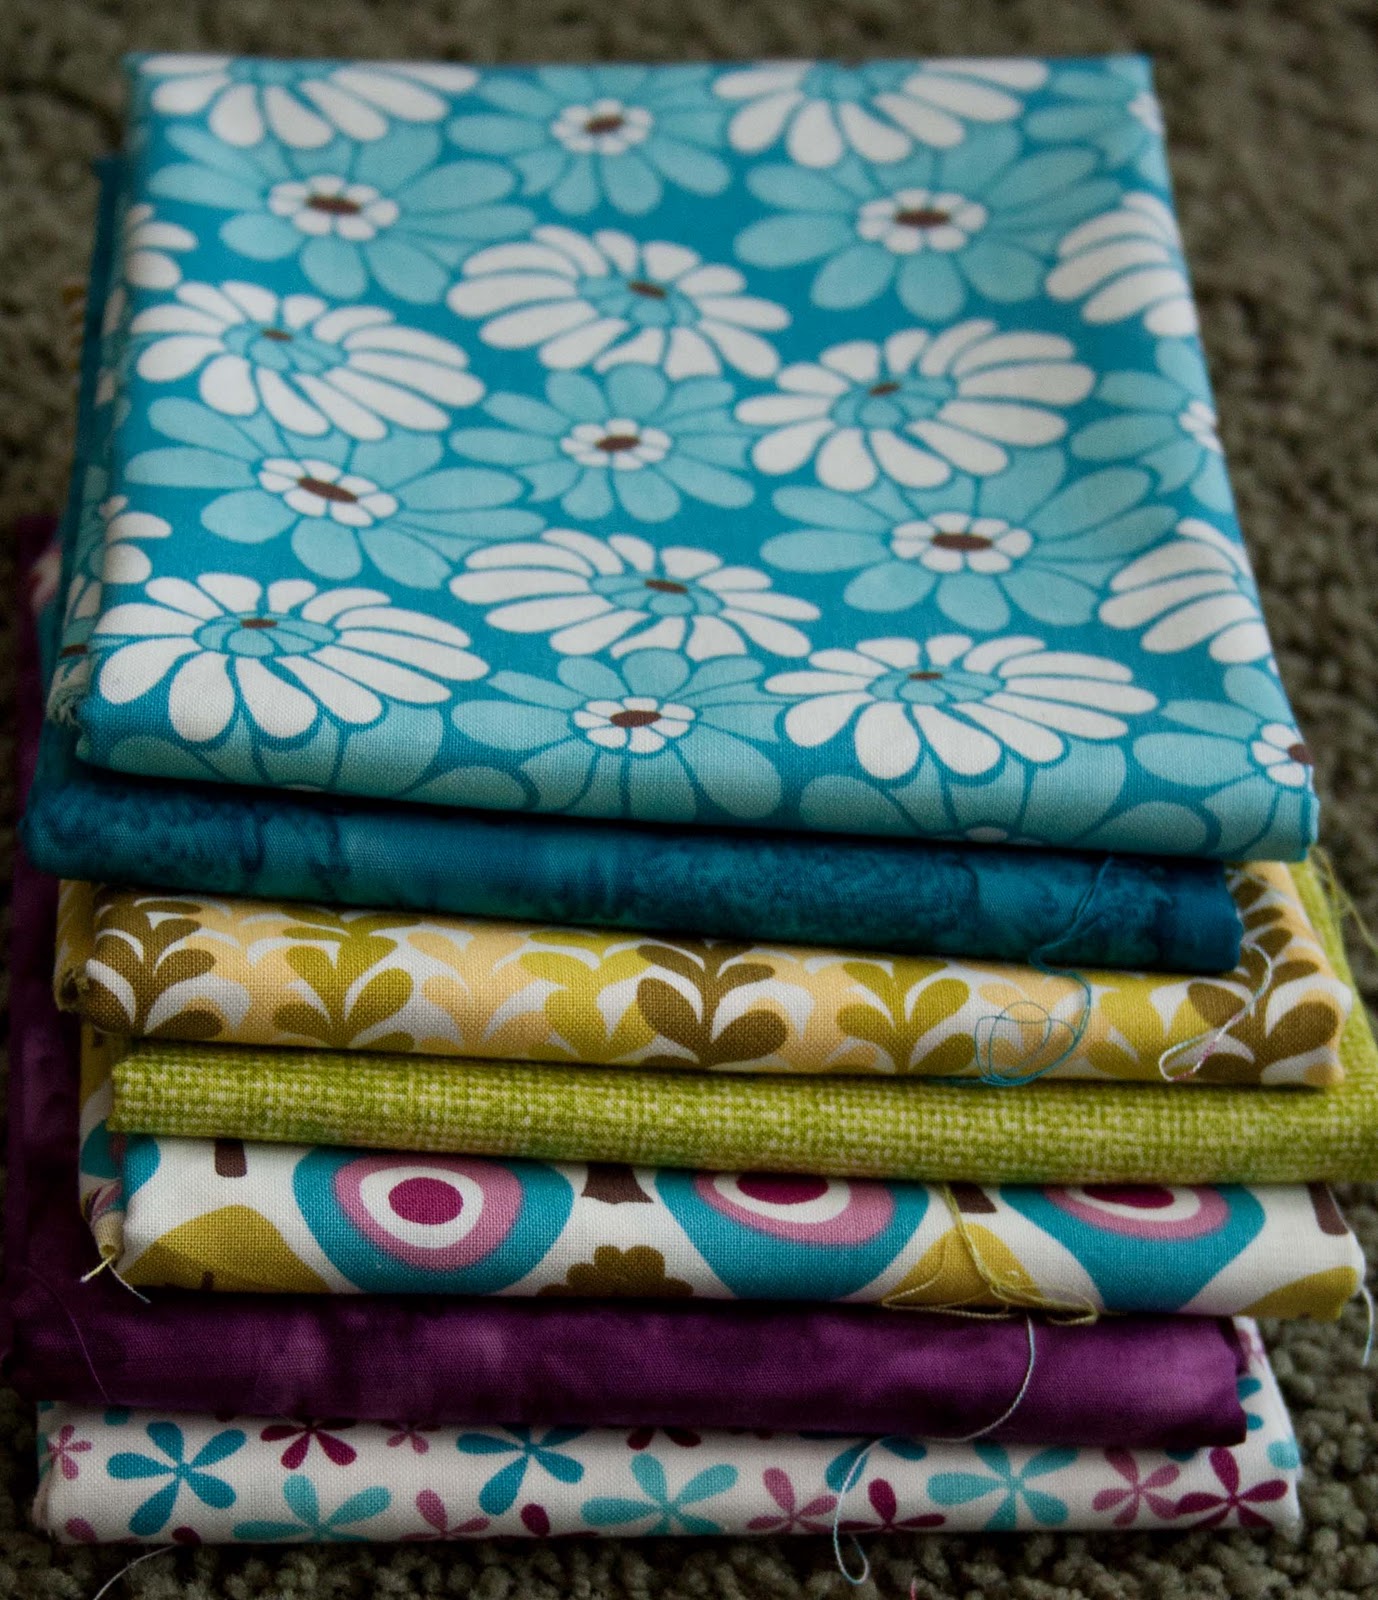
I picked up some prints from the Central Park by Kate Spain by Moda, some semi-solids of Fiber Weave by PB Studio and two batiks. I bought 1/2 yard of the 7 fabrics. This will definitely be enough to do a simple quilt, and ideally there will be enough left over to make two euro shams as well.
I then rummaged through the linen closet and found a set of white king sized sheets from Ikea.
I have turned the contour sheet into a big piece of usable fabric (76x100"), this will be cut up to be patched into the front. The sheets were then washed and ironed. Ugh I do not recommend ironing a king sized sheet.
Now the super fun part! Piecing the colors and putting it all together!! Stay Tuned!
![]() |
| Isabella is always a huge help. |
The first room of the house we decorated was the master bedroom. I thought it was a good idea to wake up in a decorated space. It would be soothing and then after everyone is awake and has their wits about them the rest of the undecorated/unfurnished house would await. But that room would be a nice little oasis from it all. Our first winter we were still on propane, which among other things is expensive, so since we were working most of the time, we treated our bedroom like a studio apartment, thereby saving ourselves some heating costs.
I didn't have any trouble with paint color and the furniture is really nice, and I like the room, but bedding... I've always had trouble, Currently my bed looks like this:
![]() |
| Very Unremarkable |
That is a on-sale duvet of micro-suede, those are some tone on tone euro-shams and boring sheets. Beige and white... I know it's hard to believe the person who picked out that red fabric could have such a large swath of beige in her house... but it's true! The duvet is snuggly, warm and child/pet friendly, just not very exciting. So for my next project I am going to give my bed a makeover! I want it to be relatively easy to complete, be appropriate for the warm weather which is already upon us, and freshen up the room. So from my favorite quilting blog I found this pattern. It looks easy and modern.
![]() |
| She is such a shy little girl. |
I picked up some prints from the Central Park by Kate Spain by Moda, some semi-solids of Fiber Weave by PB Studio and two batiks. I bought 1/2 yard of the 7 fabrics. This will definitely be enough to do a simple quilt, and ideally there will be enough left over to make two euro shams as well.
I then rummaged through the linen closet and found a set of white king sized sheets from Ikea.
I have turned the contour sheet into a big piece of usable fabric (76x100"), this will be cut up to be patched into the front. The sheets were then washed and ironed. Ugh I do not recommend ironing a king sized sheet.
Now the super fun part! Piecing the colors and putting it all together!! Stay Tuned!
Thursday, March 17, 2011
Back o' the Quilt
Well, if anyone had told me that I would be finished with the back just two days later I would have said they were crazy. BUT ITS FINISHED.
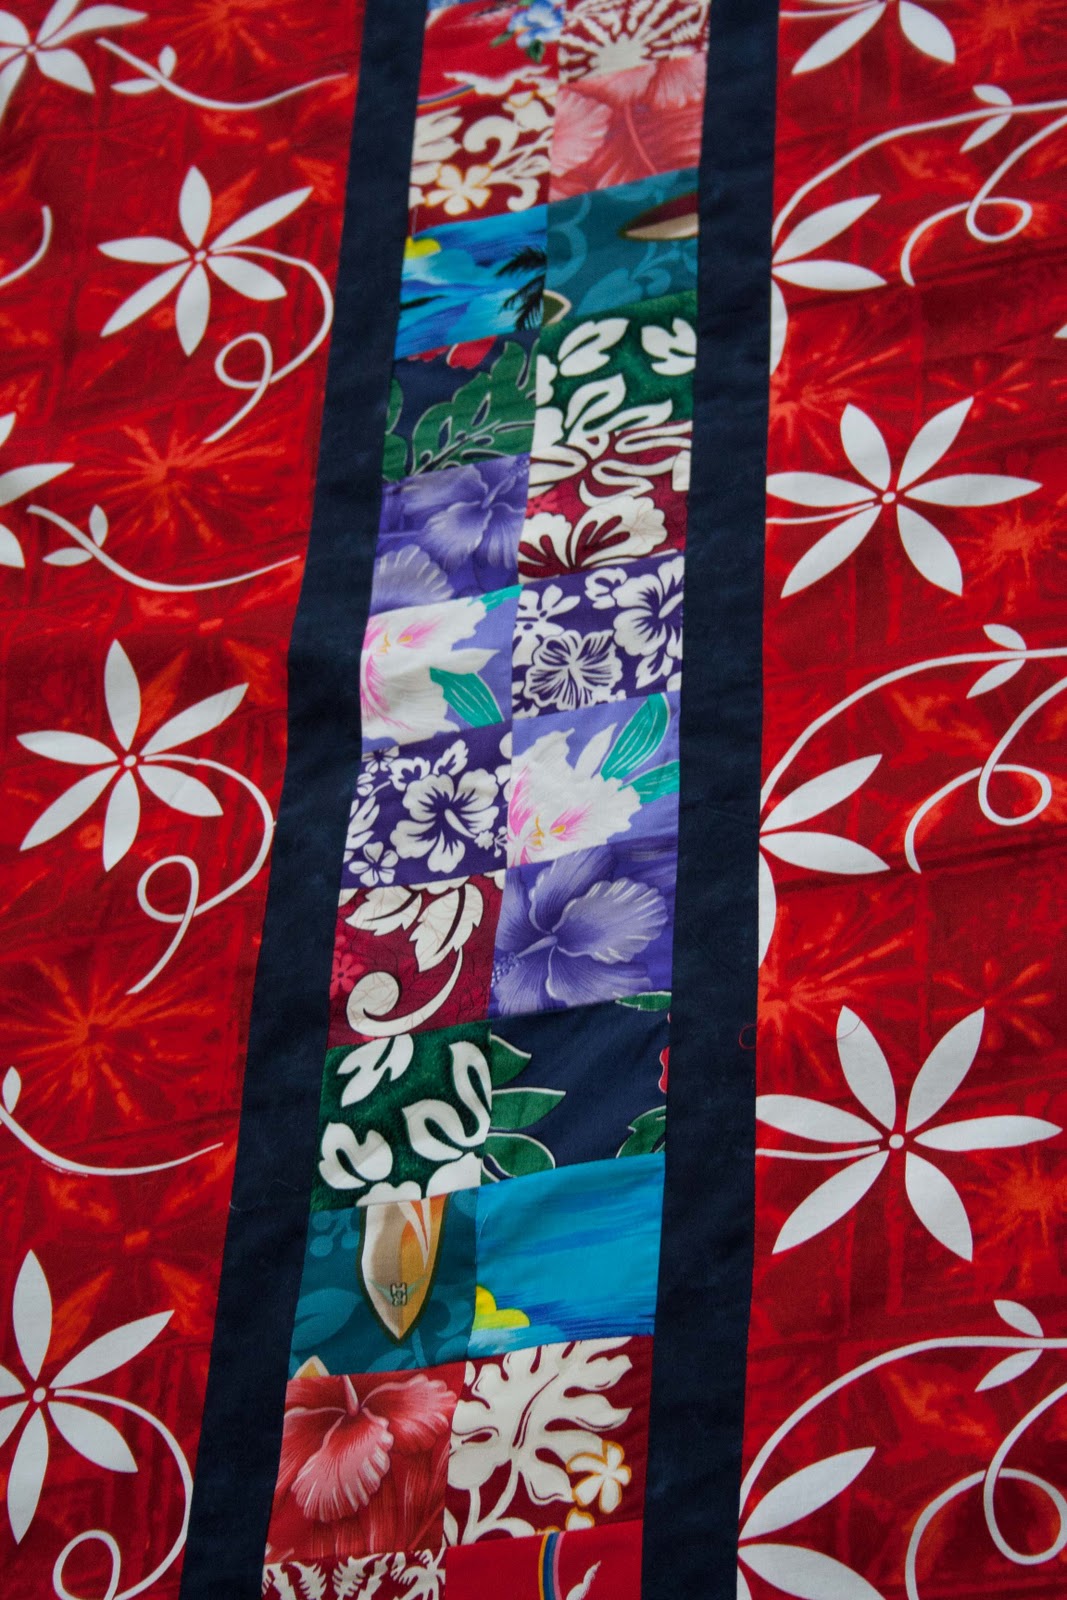
So I know what you're thinking, "wow Liz... that's REEALLY red". Yes, yes it is. But I'm not afraid of color and, let's not forget this is the back of the quilt, so this will only show when little bits of it peek out, perhaps if it's folded carelessly or turned back. I could have chosen a dirtier, darker red batik for the back. It was very boring. The front is so exciting and the back needed a nice big "Hawaiian" print. I was actually looking for something that had more blue and green in it as well as red, but apparently this season tropical looking fabrics are not in, or at least not in now. I love red, it's one of my favorites and the print couldn't be more perfect.
The back is significantly larger than the front. At the end of the day I'm not exactly sure where my patchwork strip will land, but I'm thinking around the bottom third.
The patchwork strip is an idea I got from reading my favorite quilting blog. All of her quilts have interesting backs, nothing too complicated but way more fun than just one big solid. This is very smart because it uses up some leftover scraps, and it allows you to not have any awkward seams. The strip came together really fast and its just the slightest nod to the front of the quilt.
The next step is to procure batting and quilt 'er up! So I know how to procure batting, but I have no idea how to properly quilt something like this. From some previous projects know how to bind very nicely, but again... that pesky quilting part. So since I really do not want to sew lines, on the bias or otherwise; I am going to practice doing some curly q's and see if I can't quilt this up myself. The original goal I set for myself was to have the top of the quilt done by May. I have the top AND bottom done and it's only March! It has been five years and i'm not going to rush the quilting.
I could pay someone to do it, but as this seems to be something I enjoy it's high time I learned how. Eventually there will be another post showing the completed quilt, but it's going to be awhile, already something else had caught my attention, and this project I can actually complete :)
Tuesday, March 15, 2011
Top of the Quilt!
This is my first real attempt at a scrappy patchwork quilt. I am really happy at how the top worked out, and when it's photographed from about 10 feet away it looks a lot like a stained glass window! I used TONS of pins to make sure that everything lined up. I am the kind of person who rushes through everything and then regrets that I didn't take a few more minutes to do something right. So it was very painful for me to put as many pins in and check and double check like I did, but I'm SO glad I did.
Now I need to start working on the back. This is what I have. (Cute baby not required to make a quilt)
Lately I have reading Elizabeth Hartmann's quilting blog, and I love what she does for the back of quilts, it's simple but not just a plain piece of fabric. I just ordered her book, and may wait for that before I start cutting. As you can see I don't have a lot to work with and will probably need every last bit.
What's cool is I still have so much fabric left from the original box that I think I could make at least one more quilt. I probably won't do it next because I want to try something else with bigger pieces and other colors.
Subscribe to:
Posts (Atom)